
Setting up A/B Test with Google Optimize - Example
In this post I describe #how I set up my first A/B test using Google Optimize.
If you haven’t yet installed it on your Minimal Mistakes website, you can read the #howto here.
Stating the Objective
A/B test is a randomized experiment to test two variants in order to decide which performs better. Variant A is usually the original (or ‘control’ using the statistical term), while Variant B is the new version you want to test (or ‘treatment’).
In my case, I decided to change the titles of my #howto series and see if I can get more pageviews. Right now, they are in the form of part I, II, III and IV. The original hypothesis was that if I call my posts in this temporal progression style and link them all together through cross-reference, people would check other parts and so I generate more traffic. However, such an approach is targeted at complete starters - people who want to build their website from scratch (like me). What I didn’t realize at that time is that people search on Google how to solve their specific problems, which is not necessarily equal to “whole package” of website building. Since my major traffic source is Organic Search according to Google Analytics, it makes sense to rename the titles so that they reflect the different users needs.
So my A/B test will do the following - change titles of four posts on my index page from:
- Personal Website with Minimal Mistakes Jekyll Theme HOWTO - Part I
- Personal Website with Minimal Mistakes Jekyll Theme HOWTO - Part II
- Personal Website with Minimal Mistakes Jekyll Theme HOWTO - Part III
- Personal Website with Minimal Mistakes Jekyll Theme HOWTO - Part IV
to
- How to install Minimal Mistakes with Docker
- How to customize Minimal Mistakes
- How to host personal website on GitHub Pages and use private domain
- How to improve SEO, enable comments and add Google Analytics
Simpler and neater, right?
Setting up new A/B test
Run Google Optimize in Chrome so that you can easily edit your webpage with Optimize Chrome extension later.
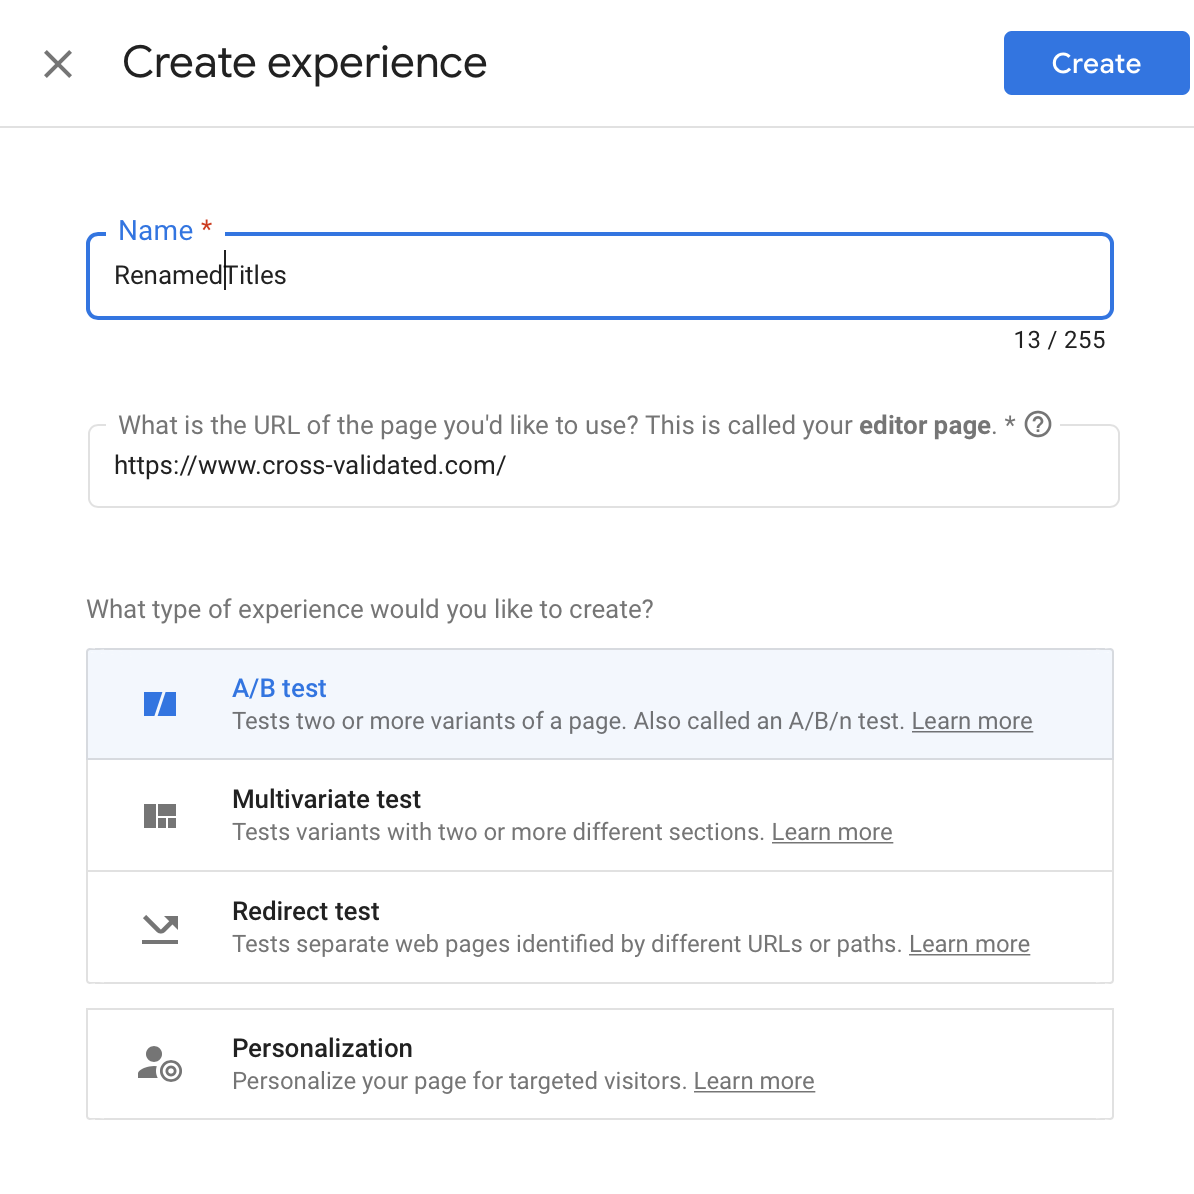
In Google Optimize go to your container and click on “Create experience”. Give it a name and choose what type of experiment you want to conduct.
Since my goal is just to test two versions of title, I went with A/B test. If I wanted to test, say changing the title and changing the color of the link from blue to red as it appears on my website, I would need a Multivariate test for that.
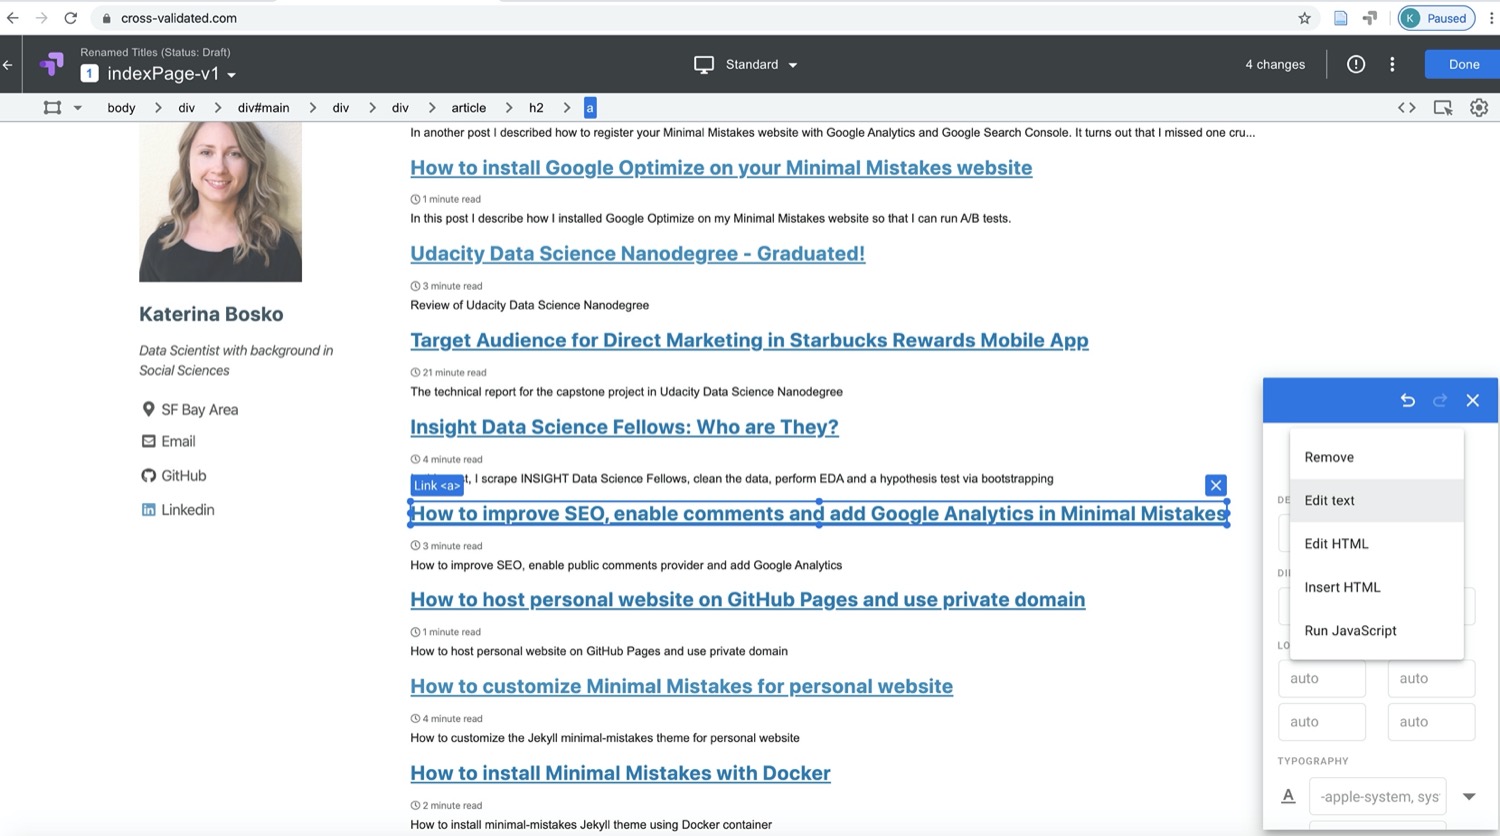
Now we need to “Add variant”, give it a name and edit it with the help of Optimize Chrome extension. The process is rather straitforward - click on title -> Edit element from the bar on the right -> Edit text.
The new version of the index page I will be testing looks like this:
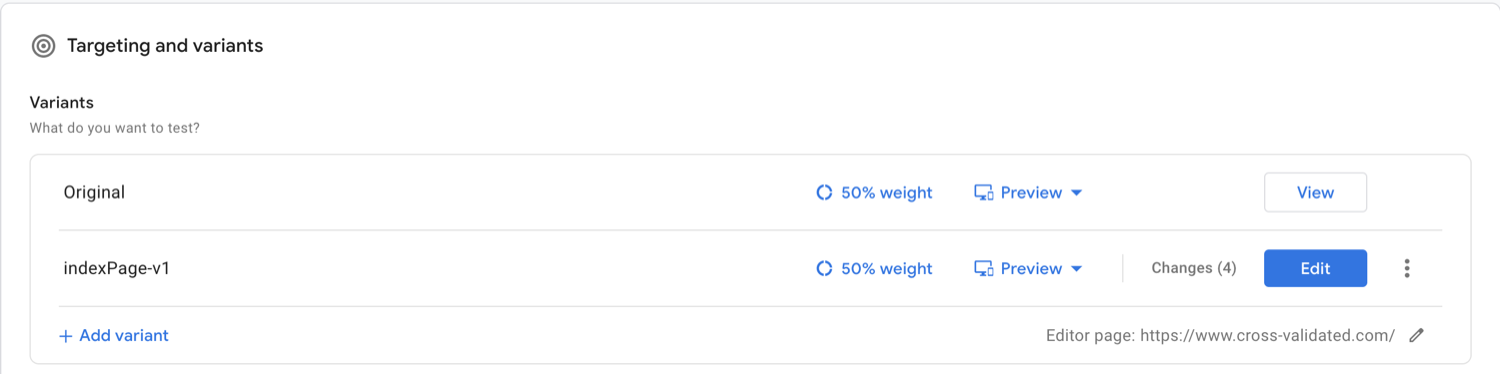
Now we need to decide if we want to change weights. I decided not to do it and go with the custom 50/50 split, meaning that half of the users will be exposed to the original version of the page and another half will see a modified version.
In the next step, I linked my Google Analytics account for measurement and set up Custom objectives. Here’s the example:
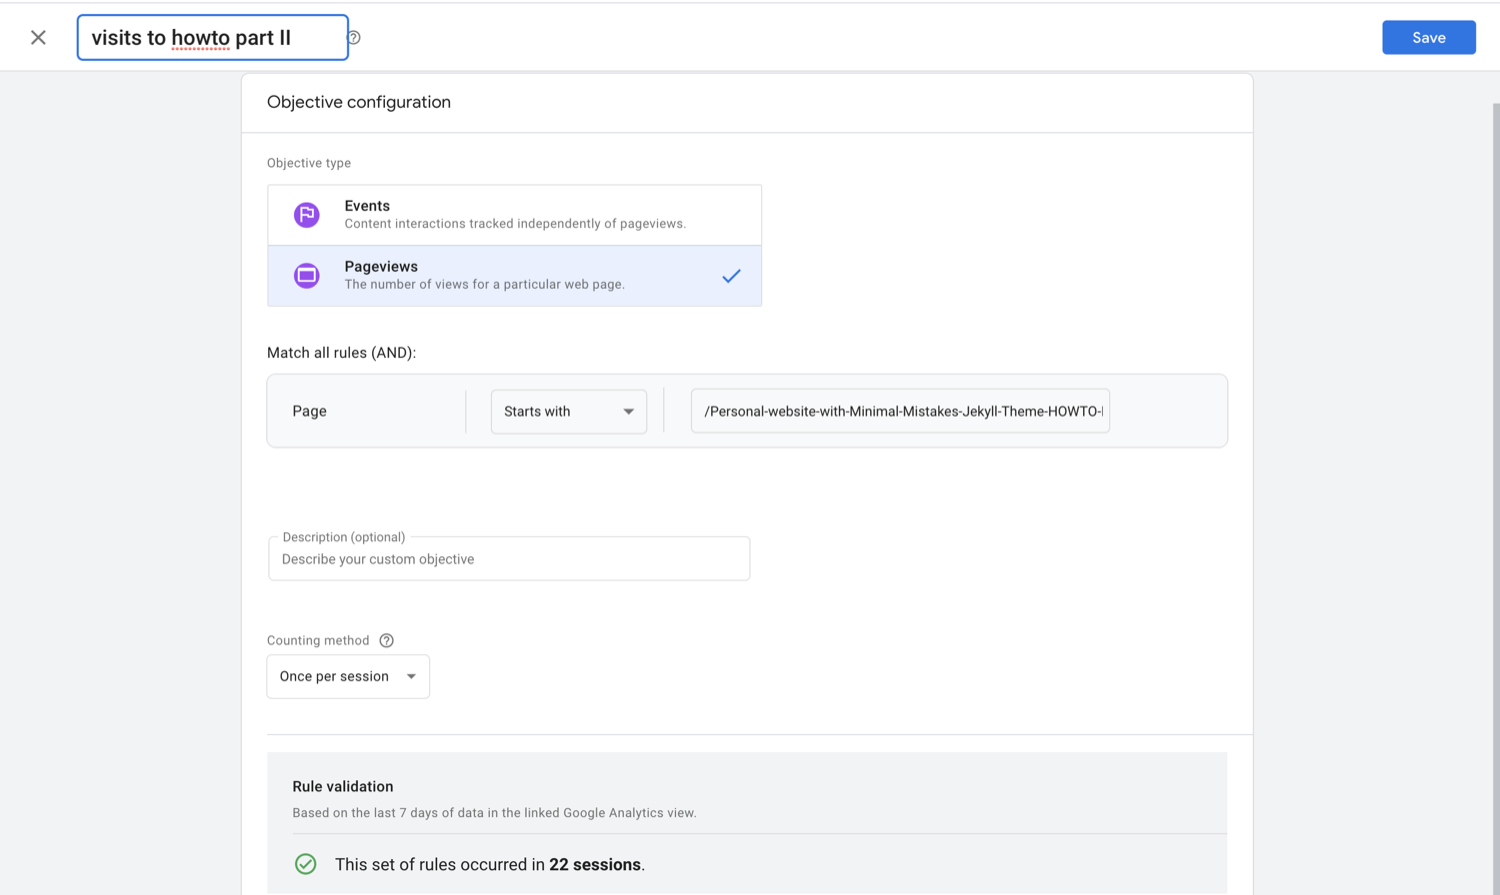
Since I am allowed to add simultaneously only 3 objectives, I decided to go with the aggregated page views for all 4 pages and then add two more on the pages that were most viewed according to the Google Analytics report.

So, now my experiment is ready to run!
I will report the results in a separate post. Stay tuned! :)

Leave a comment