
How to Correctly Set Up Internal IP Filter in Google Analytics
Google Analytics allows you to filter out data based on IPs, which comes handy when you want to exclude your own views.
It turned out that my internal IP filter did not work properly and my Google Analytics data all this time was contaminated by my own page views. :(
If you want to avoid my mistakes, read through.
Note: It is important to note from the start that applying Filter in Google Analytics is permanent, meaning that Google Analytics will not record excluded data and you will not be able to access it at later stage. So use Filters precautiously.
Setting up Internal IP Filter in Google Analytics
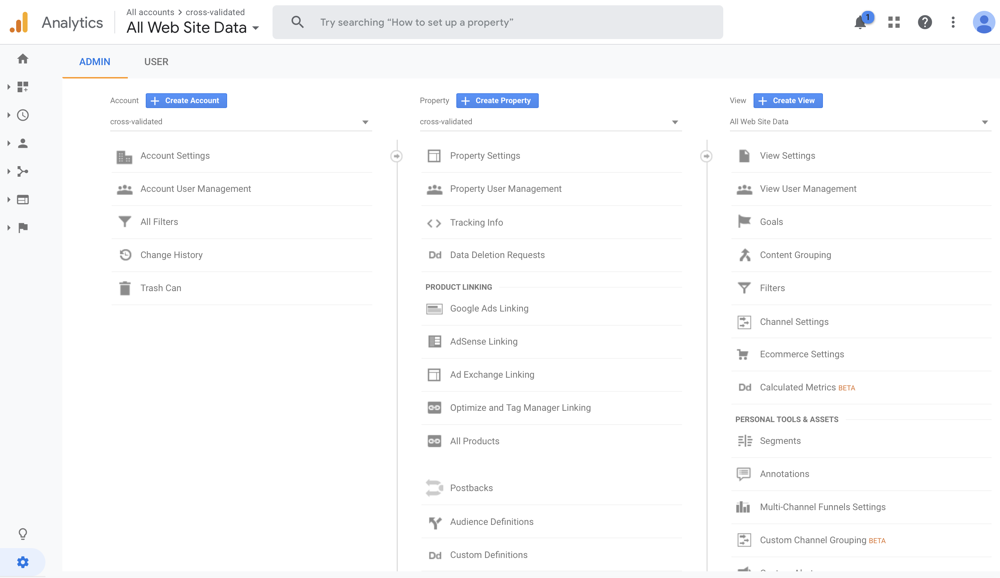
Go to Admin and choose All Filters from left pane:
Click Add Filter and configure it like so, inserting your IP adress respectively:
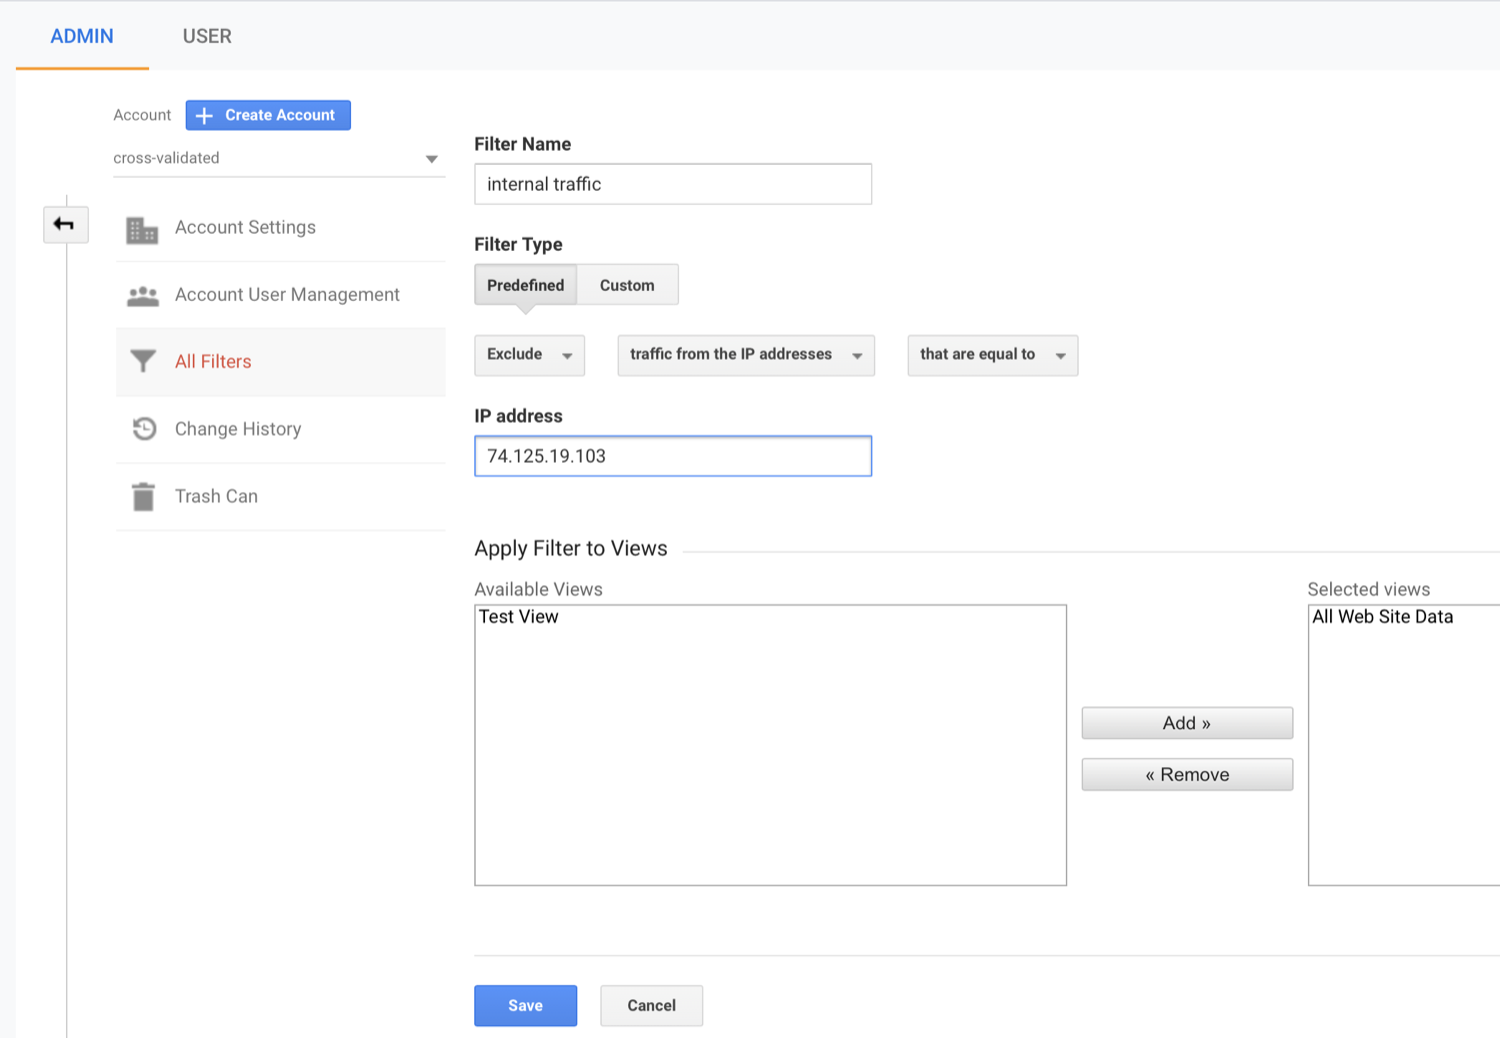
Note: If you don’t know your IP address, just google “What is my IP address”.
I have here two views - All Web Site Data and Test View. This will be useful later when we will be testing the internal Filter. So if you don’t have the Test View create it now (Admin -> Create View on the right pane).
Make sure that you added only All Web Site Data to Selected views, while Test View is not selected. Don’t forget to Save.
Troubleshooting 1 - No IP Anonymization
Theoretically, setting up the Filter as described above should suffice. My mistake, however, was to allow IP anonymization on my Minimal Mistakes website.
So you want to make sure that anonymize_ip is set to false in _config.yml:
# Analytics
analytics:
  provider               : google-gtag # false (default), "google", "google-universal", "custom"
  google:
    tracking_id          : UA-XXXXXXXXX-1
    anonymize_ip         : false # false (default)
    optimize_id          : GTM-XXXXXXX
Troubleshooting 2 - Checking Filter
One way to check if your internal Filter is NOT working is to open your website and go to Real-Time Report in Google Analytics. If you don’t have much traffic on your website, you will notice the 1 person on your website that has suspiciously the same location as yours (this is how I found out…).
However, there is a better way to check.
For this, you need to install two extensions in Google Chrome -
Make sure you enabled them both. Google Analytics Debugger needs to be explicitly turned on by clicking on its icon. They will appear then in the top right-hand side on your Google Chrome address bar like so:
Now open your website and record a flow with Google Tag Assistant. If you need more info, here’s how from Google.
Note: For our purposes, you don’t need to go through the whole flow. Just check one-two pages.
When you finished recording, click Show Full Report. Make sure to check both boxes - for Test View and for All Web Site Data.
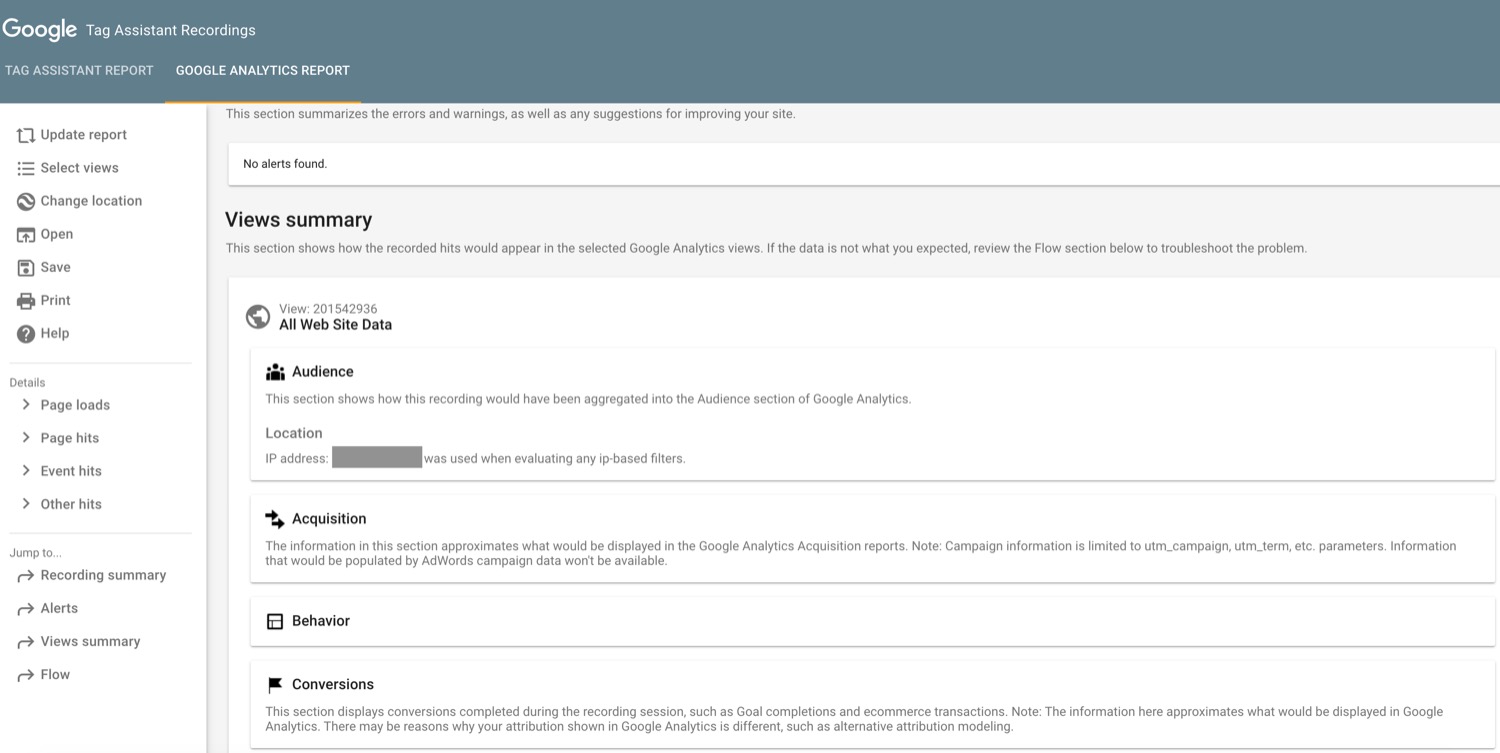
You will be directed to a Google Tag Assistant Recordings webpage with two reports - one by Tag Assistant and another one by Google Analytics.
You will see Tag Assistant Report by default. Navigate to Google Analytics Report in the top left corner:

Now go to Change location in the left pane (see pic above). Choose Use a specific IP address and enter your IP address on the right.

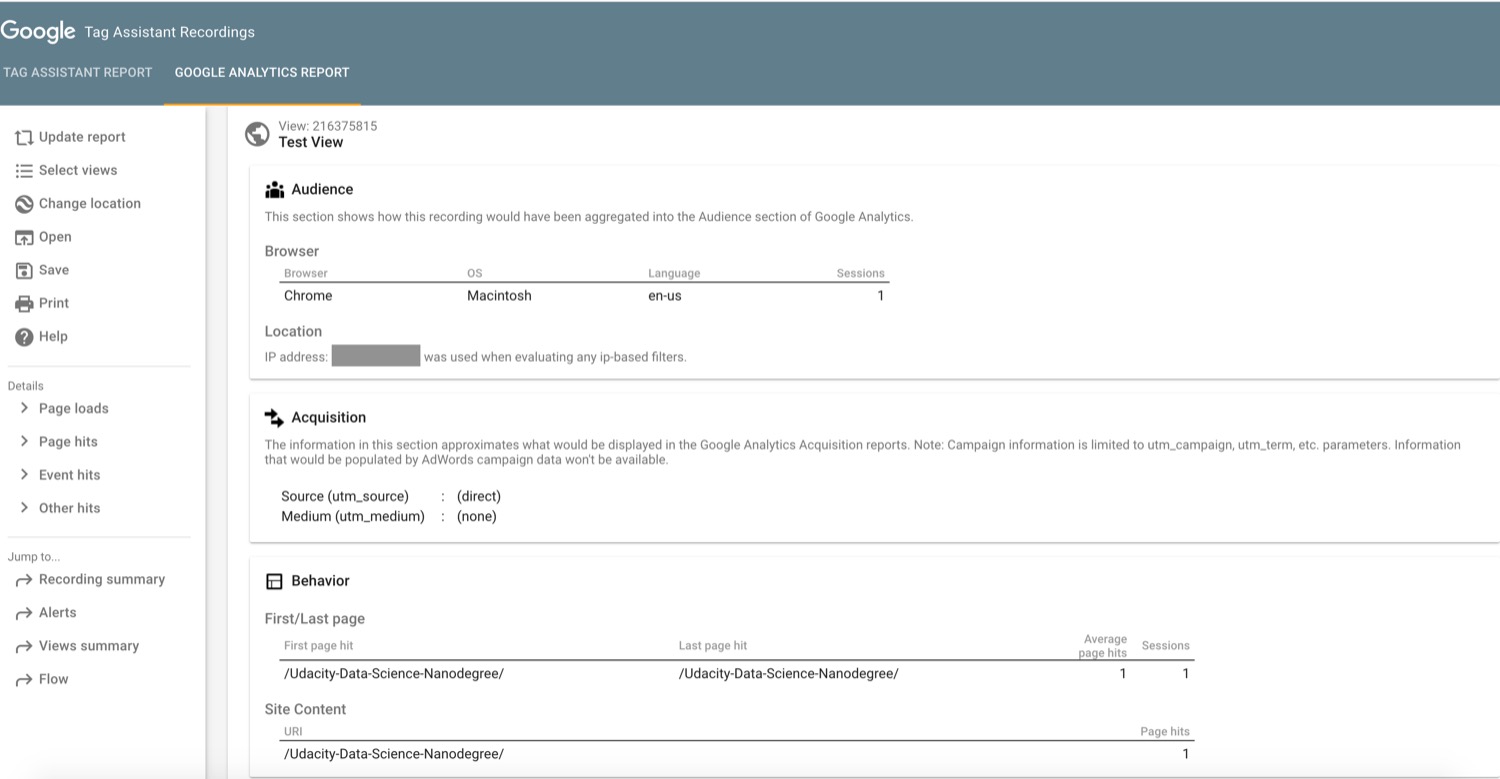
Remember that we configured the Views in Filter differentely - enabled it for All Web Site Data and disabled for Test View? So here it comes in handy.
If your Filter was set up correctly, you will see no data was recorded for All Web Site Data.
On the other hand, the Test View recorded some information about the user:
If you have the same information for both Views, this means that your Filter was not configured correctly. Try going through the steps described above again.
Thumbs up below if you found this post helpful!
Happy blogging.

Leave a comment